We have been using Final Cut Pro over the past few days in order to produce our animatic. It has certainly been helpful to use Final Cut again after last years AS task and it has been useful playing around with the length of shots and sound in our animatic because it has prepared us for the final editing task. As seen in the screen-grab below we have been playing around with the effects (crop/transform/color) in order to familiarise ourselves with the workings of final cut once more and improve the quality of our animatic. We also experienced a problem with the colouring of this character below so, as you can see we exported the 'still' back to photoshop, changed the colouring and then imported it back into Final Cut. We then hid the initial clip and placed the new one below in order to keep the sound timing the same. This was important because we didn't have one continuous soundtrack throughout it would have been hard to re-adjust the sound back to levels we preferred it.


As you can see above ^^^^^, we were adding a few of the stills from our storyboard (4 pictures on the left) to our animatic and were playing around with length time for each shot.
^^^^^^^^
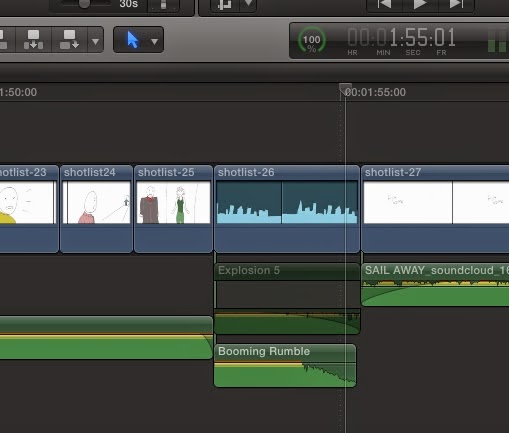
We decided to play around with the different sounds available at this point as seen above (explosion 5 & booming rumble). We wanted to create a 'sound boom' effect at this point and so decided to sample a few different sound effects until we came across 'Booming Rumble', which was the closest towards the sound boom we could possibly find. We also played around with the sound fading up and down at the end/start of each section of sound in order to improve the quality of the sound boom.

^^^^^
We again decided to use 'Booming Rumble' because it sounded extremely similar to the 'Sound Boom' effect we see in most of our film influences.

MT
No comments:
Post a Comment